Search This Blog

Thursday, December 26, 2013

Merry Christmas, Hannah! 2013

This December I put a lot of time into making the foods of this Christmas Holiday special for Hannah.  I found a new resource for recipes.  Enjoy Life's Facebook page has a free downloadable recipe book that has taught me a few new tricks of the trade.  The following are all the new and old- but soon to be posted- foods and treats I created for Hannah.


From the Enjoy Life ® cookbook:


(no picture yet)

New Favorite Products:

Enjoy Life ® Decadent Bars- S'mores

Coconut Milk

So Delicious Dairy Free Chocolate Frozen Dessert (aka Soy free Dairy Free Ice Cream)
Ooooh,  I just found a downloadable recipe book from So Delicious!  Stay tuned for our favorites from that resource!


Fudgy Chocolate Sunbutter Pie

This one comes from the Enjoy Life® cookbook.  I forgot to take a photo.

1 Classic Graham Cracker Crust (recipe below)
1 bag Enjoy Life® Semi Sweet Mini Chocolate Chips
1 T. tapioca starch
1 c. cold water
1 c. smooth sunbutter
1 T. vanilla
1 T. corn syrup
Sunflower seeds, shelled

Prepare Graham Cracker Crust.  Set aside.

Pour chocolate chips into a medium sized bowl, reserving a small amount for pie topping.  In a small saucepan, whisk the tapioca starch into the cold water.  Heat over medium heat, bring to a simmer to turn into a translucent gel.  Pour immediately over chocolate, stirring constantly, until all chocolate melts. Lumpy and bumpy- don't worry!  Immediately whisk in the sunbutter.  It will begin to look smooth, though possibly grainy.  Stir in the vanilla and corn syrup.  Pour into the prepared pie crust.  Garnish with reserved mini chips, crumbs and sunflower seeds.  Refrigerate 3 hours or overnight.  Serve cold or room temperature.  Store tightly covered in the refrigerator up to 4 days.

Enjoy Life's Classic Graham Cracker Crust
1 box Enjoy Life® Crunchy Vanilla Honey Graham Cookies
1/3 c. sugar
1/4 c. oil or melted Spectrum Shortening, or coconut oil

Preheat oven to 350°.
Place entire contents of boxed cookies in a food processor with the sugar.  Process until fine. Add oil and process until mixture becomes a little wet.  Reserve a small amount to sprinkle on top of the sunbutter pie.
Pour the mixture into the middle of the pie pan. Use your fingers to spread and press the mixture to 1/8" thickness covering the whole pie pan with no holes.
Bake for 8-10 min., or until crust is golden brown.


Peppermint Bark

Hannah's Favorite Chocolate Candy!

1 bag Enjoy Life® Semi Sweet Mini Chocolate Chips
4 crushed candy canes

Line a large tray with foil.
Empty the bag of chocolate chips into a small glass bowl.  Melt in the microwave on the melt chocolate setting. (Yes, mine has a melt chocolate setting.  Therefore, I don't know how much time to tell you to do it in your microwave.  Try 30 seconds, stir, 30 seconds stir, etc?)
Pour melted chocolate onto the wax paper.  Sprinkle the crushed candy canes over the top.  Using another piece of foil, cover the chocolate and candy candy canes.  Gently press down on the foil to set the candy canes into the chocolate.  Place the tray in the refrigerator for 30 min.  Chocolate is set when the foil removes easily form the chocolate.  Break the Peppermint Bark into pieces, store in an airtight container.  If the room it very warm, it's best kept in the refrigerator.  This made enough to fill a medium sized plastic holiday candy container.

Sunbutter Cups

This comes from the Enjoy Life® cookbook, except I did not use the Dark Choco Boom bars.  Instead I the regular Choco Boom bars.  I tried my hand at tempering the chocolate, so I did not add add sunbutter to the chocolate as their recipe book said.  As a result I was short on chocolate, I did not get 12 cups.  Next time I will use 2 1/2 Choco Boom bars.
Sunbutter filling:
3 T. smooth sunbutter
1 t. vanilla extract
2 t. corn syrup
1 T. powdered sugar

Combine all the ingredients until smooth.  Roll into marble sized balls, flattened a little.  Set aside.

Line a mini cupcake pan with paper liners.

2 1/2 bar Enjoy Life® Chocolate Choco Boom® bars, regular or dark
To Temper the Chocolate: Chop the chocolate into fine pieces.  Place 2/3 of the chocolate in the top pan of a double broiler.  (I do not have double broiler. I used a medium sized pan full of water with my all-metal fry spider balanced over the top the medium pan. I placed the small saucepan on top of the spider.  It was a balancing act, but it worked!)  Heat over hot, not boiling water, stirring constantly until chocolate reaches 110° - 115° F.  Place the top pan on a towel.  Cool to 95°-100° F.  Add the remaining chocolate to the top pan, stirring until melted.  The chocolate is now ready to be used for molding candies, coating, or dipping.

Drizzle tempered chocolate to cover the bottom and up the sides of each muffin cup.  Add the flattened sunbutter ball, top with chocolate to cover. Place in the refrigerator to set.


Chocolate Covered Cake Donuts

Just like the little Hostess kind, only allergy free!  This recipe comes from the Enjoy Life® cookbook.
1 T. Tapioca Starch
1 cup cold water
3/4 c. sorghum flour plus extra for dusting pans
1/4 c. tapioca starch
1 1/2 t. baking powder
1/4 t. salt
1/8 t. ground cinnamon
3 T. sugar
1 T. honey
2 T. Spectrum Shortening
1/3 c. applesauce
1/4 c. coconut or rice milk
1/2 t. apple cider vinegar
1/8 t. baking soda
1 T. Enjoy Life® mini chocolate chips

Preheat oven to 375°.

In a small saucepan, whisk 1 T. tapioca starch into 1 cup water until it dissolves.  Heat over medium heat until the gel thickens and becomes translucent.  Bring it just to simmer, them remove from heat.  Pour into a container to cool.  Leftover gel can be refrigerator and used within 1 day.
Grease the mini donut pan with a coating of Spectrum Shortening.  Sprinkle 1/4 tsp. of sorghum flour into each donut space.  Tilt and turn the pan to coat the donut spaces with the flour.  Shake out excess flour.
In a small bowl, combine the 3/4 cup sorghum flour, 1/4 c. tapioca starch, baking powder and salt and cinnamon.  Set aside.
In a medium bowl, cream honey, sugar, and shortening.  Mix in applesauce.  Mix in 1/2 the combined dry ingredients.  Mix in milk, then the remaining 1/2 of the combined dry ingredients.  Fold in 2 T. of the tapioca gel, 1 T at a time.  Add the apple cider vinegar.  Add the baking soda and the chocolate chips.
Spoon about a tsp of batter into each side of a donut space, careful to only fill about 1/2 full.  You can also fill a mini muffin tin with a small cookie scoop of batter and make regular size donut holes.
Bake for 5 min. for the donuts, 7-8 for the mini muffin donut holes, 15-17 if making full size donuts.
Cool on wire racks.  Ice with a Sugar glaze, dust with powdered sugar or cinnamon and sugar, or glaze with Chocolate glaze (Recipe below).

Chocolate Glaze for Donuts

1 bag Enjoy Life® Semi Sweet Chocolate Chips
1/3 c. plus 1 T. water
1 T. Spectrum Shortening or coconut oil
1 T. sugar
1 t. vanilla extract

Place the chocolate chips in a small glass bowl.  In a small saucpan, combine the water, shortening and sugar. Bring to a boil.  Allow to boil 1 min.  Pour over chocolate chips.  Allow to sit 30 seconds, then stir with a wooden spoon until chocolate in melted.  It may be necessary to microwave for 15 seconds to melt all the chocolate. Stir in vanilla extract.  It may also be necessary to add 1 tsp. of hot water at a time if it is too thick for glazing the donuts.
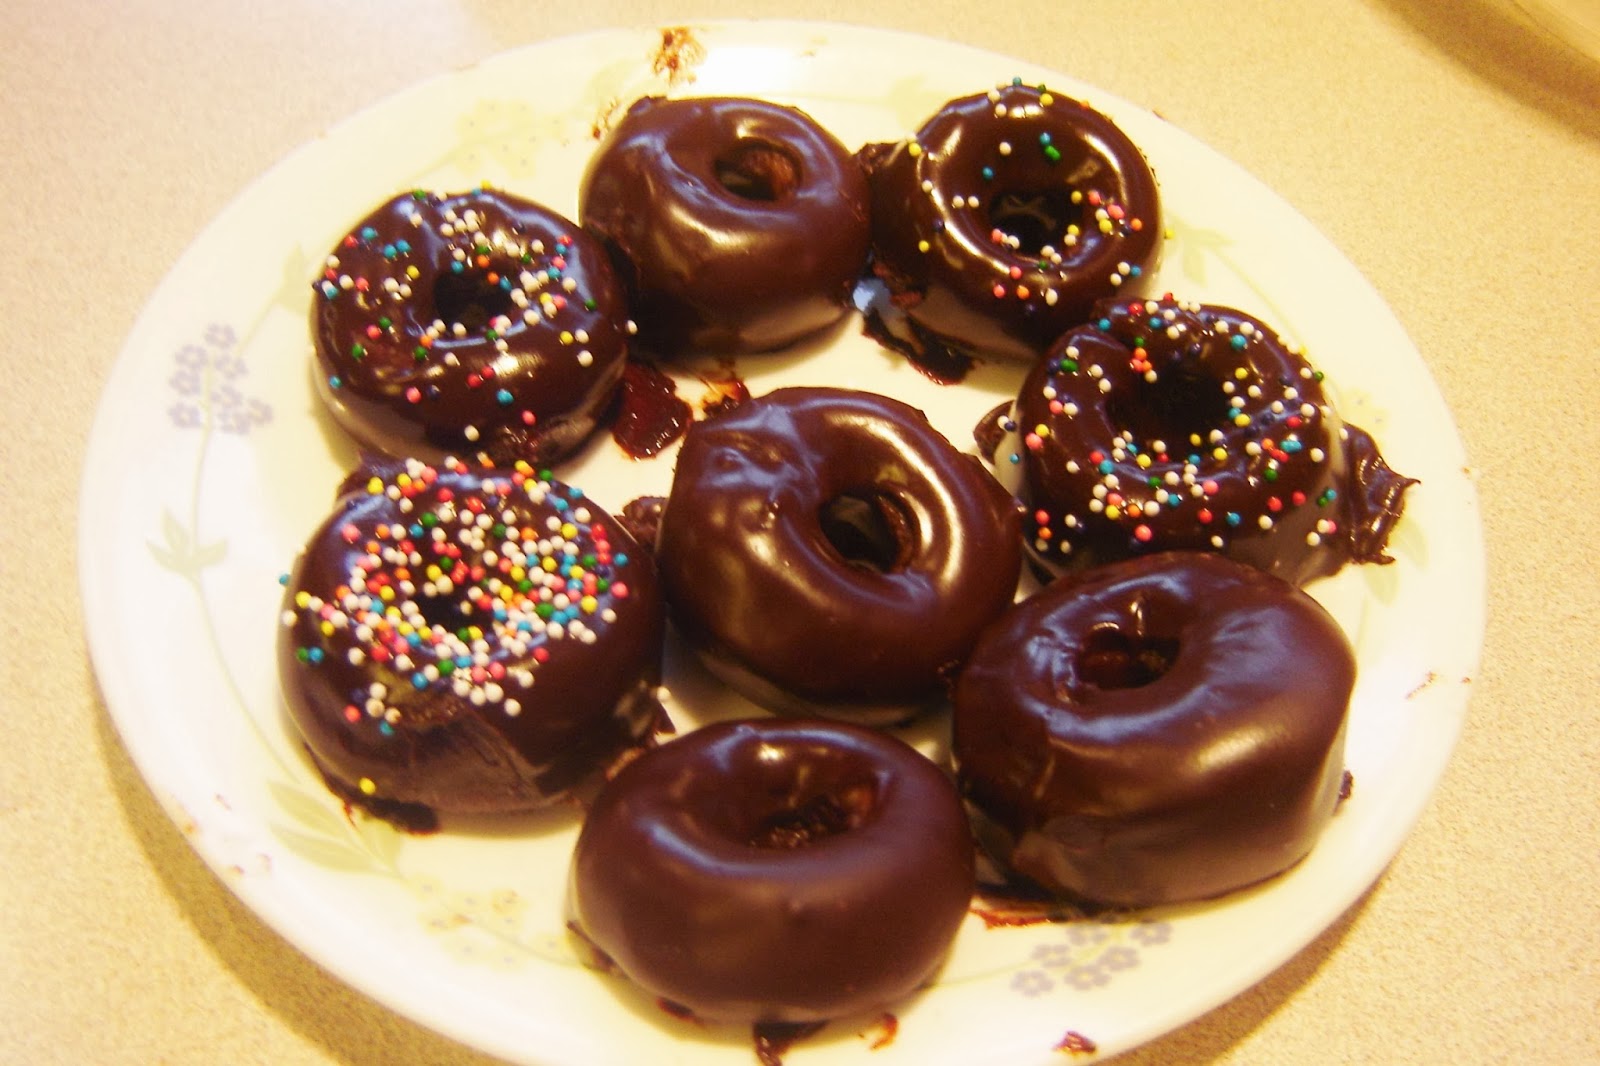
To glaze the mini donuts, I used a thicker plastic straw that belonged to a water bottle.  I place the straw in the hole of the donut, dunked it, let it drip a few seconds, then placed them on a rack set on a cookie sheet to catch the drips. If you are adding sprinkles, sprinkle immediately upon the donuts being placed on the rack. Once the rack was full, I place the tray in the refrigerator to harden the chocolate.  The picture above looks as messy as it is because we moved the donuts to take the photo before the last of the donuts had hardened up.

Enjoy!  Donuts may be stored in the refrigerator for up to 2 days.   Un-iced or sugared donuts may also be stored in the freezer.

Mint Chocolate Crinkle Cookies

Yum! Makes 2-3 dozen cookies  This is an altered version of the Chocolate Crinkle cookies found in the Enjoy Life® cookbook.  Because I didn't have the mini chocolate chips, I added the mint extract instead.

2 tsp. tapioca starch
1 cup cold water
2 cups sugar
1 1/4 cups cocoa powder
2 1/2 tsp. baking powder
1/2 tsp. salt
1/2 cup oil
1/2 T. vanilla extract
1/4 tsp. peppermint extract
1 3/4 cup plus 3 T. gluten free flour
1/2-1 cup mini chocolate chips, optional (I did not use them in the photo above)
2 cups powdered sugar

(To make not Mint cookies, eliminate the mint extract, increase the vanilla to 1 T. and add the mini chocolate chips.)

Preheat oven to 350°.  Line baking sheets with parchment paper.  
Combine tapioca starch and water in small saucepan.  Stir until tapioca starch dissolves.  Heat over high heat until the tapioca gel is thick and translucent. Do not boil.  Pour into a glass bowl and place in refrigerator until ready to use.
In a large bowl, combine sugar, cocoa powder, baking powder and salt.  Add the oil, vanilla extract, mint extract, and cooled tapioca gel.  Mix until evenly combined, it will look spongy. Add the flour all at once and mix.  Stir in chocolate chips if you are using them.  The dough should be sticky but pliable, not too wet and not hard.
With a small cookie scoop, scoop up a ball of dough, drop into powdered sugar and roll to cover.  Place on the covered cookie sheet.  Bake 12-14 min. until crackled and not wet.  Remove to wire racks to cool.  Store in an airtight container.

Cranberry Brussels Sprouts

This is a pretty red and green side dish that goes well with Christmas dinner.
Sorry, no picture this time.

1 lb. Brussels sprouts, washed and trimmed
2 T. olive oil
1/4 tsp. kosher salt
1/4 tsp. freshly ground pepper
4 oz. dried cranberries
Sesame seeds

Using a food processor with the slicing attachment, slice the Brussels sprouts.  Alternatively, you can use a mandolin or a knife to thinly slice the sprouts.  Heat a pan over med-high heat.  Add olive oil.  Heat a minute or so.  Add Brussels sprouts, salt, pepper and cranberries.  Cook and stir 2-3 min. until sprouts are heated and bright green.  Remove from heat, sprinkle with sesame seeds.  Serve immediately.

Makes 6-8 servings.

Honey Glazed Spiral Sliced Ham

Traditional Christmas Day Dinner!

1/2 cup honey
1/2 cup brown sugar
2 tsp. dijon mustard
1/2 tsp. ground cinnamon
1/4 tsp. ground nutmeg
8-9 lb. spiral sliced Ham

Allow ham to warm to room temperature, 1 hour prior to cooking.
Preheat oven to 400° F.
Heat honey, sugar and seasonings in a small saucepan until brown sugar has dissolved.  Remove from heat and set aside.
Line a shallow roasting pan with foil.  Place ham on foil, cut side down. Pour glaze over the ham.
Cook, uncovered 20 min.  Allow to rest 10 min.  Serve immediately with dijon mustard, Grandma Bray's pineapple sauce, or Grandma Boulden's Apricot Ham sauce.

Grandma Bray's Pineapple Sauce
6 T. sugar
1 c. water
1/3 c. crushed pineapple
1 grated orange rind
3 T. cornstarch
1 c. orange juice

Combine all ingredients in a small saucepan.  Heat to boiling.  Cook 3 min. until thickened.  Serve with ham.

Grandma Boulden's Apricot Ham Sauce
1 cup apricot jam
2-3 T. mustard

Stir to combine.  Serve with ham.


Prime Rib Roast

A tradition for Christmas Eve Dinner.

1 Prime Rib Roast
Kosher salt
3 cloves garlic
1 tsp. rosemary
1 tsp. sage
3 tsp. thyme
2 T. freshly ground pepper
2 T. olive oil
2 T. Earth Balance Soy Free Natural Buttery Spread

Bring roast to room temperature 1 hour prior to cooking.
Preheat oven to 425° F.
Place roast in a shallow roasting pan.  Sprinkle with kosther salt.
Combine remaining ingredients in a small food processor and pulse until a paste is formed.  Alternatively, finely mince the garlic, rosemary and thyme, mash together with remaining ingredients into a paste.  Spread the paste all over the roast.
Place roast in oven and roast for 15 min.
Reduce temperature to 325° F. Roast 40-50 min. until internal temperature reached 130° F.  Removed from oven and allow roast to rest 15 min. prior to slicing and serving.

Broiled or Grilled Marinated Salmon

I served this at our Family Christmas Party.  Everybody loved it and wanted the recipe, so I put in this cookbook.  Sorry, no picture :(  I will next time, if I remember.

1/4 cup olive oil
1/4 cup canola oil
1/2 cup Coconut Aminos
1 clove garlic, minced
1/2 tsp. ground ginger
2 T. lemon juice, freshly squeezed preferable
3 T. Seafood Seasoning
Salmon, fillets or steaks

Combine oils and seasonings in a zippered gallon bag.  Add salmon.  Squeeze out as much air as possible and seal the bag.  Place bag in refrigerator for 3 to 12 hours, turning over occasionally.  Remove salmon from marinade.  Discard the bag and marinade.  Broil or grill salmon accordingly for fillets or steaks until flaky and tender.

Cooking Chart Guideline
Broiled fillets - 8-10 min.
Broiled steaks- 8 min. each side.

Seafood Seasoning

I use this in the Broiled or Grilled Salmon marinade.

6 T. plus 1 tsp. Salt
3 T. plus 2 tsp. celery seed
2 1/2 tsp. dry mustard
1 tsp. chili powder
1 1/2 tsp. black pepper
1 1/2 tsp. paprika
1 tsp. ground cloves
1 tsp. ground allspice
1 tsp. ground ginger
3/4 tsp. ground cardamom
1/2 tsp. ground cinnamon

Combine all ingredients and store in an airtight container.  Makes approx. 1 cup.

Mountain Mambo® Crunch- from Enjoy Life®

Like a Chocolate Granola bar!  I got this recipe off a Crunchy Flax® with Chia Cereal box first, then I also saw it in the Enjoy Life® cookbook I downloaded from Facebook.

1 pkg Enjoy Life® Mountain Mambo® Seed & Fruit Mix
1 1/2 cups Enjoy Life® Crunchy Flax® with Chia Cereal
1 1/2 cups Enjoy Life® Semi-Sweet Chocolate Mini Chips or Mega Chunks
1 1/2 tsp. oil

In a large bowl, combine Seed & Fruit Mix, and Cereal.

Melt the chocolate chips over a double burner or in the microwave.  Add oil to the chocolate.  Stir until smooth.  Pour chocolate in the See & Fruit Mix/Cereal mixture and immediately spread thin on a parchment lined baking sheet.

Cool in the freezer or refrigerator.  When completely cool and hard, break into pieces and serve immediately.  Store leftovers in an airtight container in the refrigerator for up to 2 weeks.


Chicken Macaroni

This tastes like chicken pot pie in a macaroni casserole.

1 T. potato starch
1/2 cup coconut or rice milk
1/2 cup Pacific Foods Chicken Broth
1 T. dried chopped onion
1/4 tsp. salt
dash pepper
1/4 tsp. dried sage
1 cup gluten free Macaroni, we use Andean Dream Quinoa Pasta, cooked
1 cup cooked diced chicken
1 cup mixed frozen peas and carrots

In a medium saucepan, slowly stir milk into potato starch with a wisk.  Add chicken broth, dried onion, salt, pepper, and sage.  Bring to boil over med-high heat.  Reduce heat and simmer until sauce is thick creamy about 2 min.  Stir in cooked macaroni, chicken and peas and carrots.  Heat through.  Serve immediately.

This makes about 4 servings.

French Toast

In Hannah's food world, french toast would seem to be an impossible allowance, as it is traditionally made with glutenous bread, milk and eggs.  However, I seem to have come up with a winner using dairy free, egg free, thinned pancake batter and Ener-G Yeast Free Brown Rice Loaf.

1/3 cup Bob's Red Mill Gluten Free Pancake Mix, or other gluten free pancake mix
1/2 T. oil
1 egg replacement whipped using Ener-G egg replacer
1/2 cup coconut or rice milk, or orange juice or apple juice for flavored toast
1/8 tsp. vanilla flavor (optional)
1/8 tsp. cinnamon (optional)
3-4 slices gluten free bread, we used Ener-G Yeast Free Brown Rice Loaf
oil or palm oil for the pan/griddle.

Heat a non-stick griddle to 300 degrees.
Mix pancake mix, oil, whipped Egg Replacer and coconut milk until you have a smooth runny batter.  Pour the batter into a shallow pie plate.  Push 1 slice of the bread down into the batter, covering it with the batter.  Allow the bread to soak in the batter for 30-45 seconds until it is completely saturated.
Drizzle a bit of oil, or grease a spot with palm oil on the heated griddle.  Place a battered bread on top of oil.  Cook 1-2 min. until golden brown underneath.  Flip the french toast and cook another 1-2 min. If needed, keep warm in an oven heated to 325 degrees. Serve hot with Earth Balance Soy Free Natural Buttery Spread and powdered sugar.

TIP: This batter also makes good Crepes!

Rosemary Roasted Potatoes

This is a very easy way to make flavorful potatoes and a nice change from baked or mashed potatoes.

Potatoes of any kind, russet, white or red, as many as you need to feed who are going to feed
Olive oil
Dried rosemary
Kosher or sea salt
Freshly ground pepper

Preheat the oven to 400 degrees.
Wash and scrub the potatoes clean.

If you are using russet potatoes, dice them.  Here is a pictorial guide- how to dice potatoes:
 On a cutting board, with a large sharp knife, slice the potato in half lengthwise.

Keeping the two halves together, roll the potato 1/4 of turn so the halves are one on top of the other.  Cut down through each half, cutting them each in half, creating a 4 part potato.


Keeping the four parts together, rotate the potato so your knife is at one end.  Cut about 1/2 in. from the end down through all four parts.  This will cut of 4 diced pieces of potato.


Continue moving your knife in 1/2 inch from the cut end of the potato, cutting down through all 4 parts.


This will continue to cut of 4 diced potatoes with each cut of the knife.


Until you are at the end of the potato, when you will end up with 8 diced pieces of potato if you have spaced your piece to allow a decently sized end section.


One regular sized russet makes about 1 serving of diced potatoes.


If you are using smaller red or white potatoes, depending on their size, you can leave them whole, cut them each in half or in 4th's if the the potatoes are on the larger size.

Place potatoes in a large enough bowl to allow room to toss the potatoes without having them fly out of the bowl.

Drizzle olive oil over the potatoes, and toss or stir the potatoes.  Sprinkle the oiled potatoes with rosemary, salt and pepper.  Toss again to distribute the seasonings among all the potatoes.


Spread the potatoes out onto a cookie sheet, tray or large casserole dish large enough to hold all the potatoes in a single layer. 


Place the tray in the preheated oven.  Roast the potatoes for 10-15 min.  Pull the tray out and stir up and flip the potatoes over.  Return to oven and continue to roast for another 10 min. or until potatoes are soft and somewhat golden brown.

Remove potatoes from the tray and place in a serving dish and serve immediately.   Yum!  

Sunday, December 1, 2013

Chinese BBQ Pork

This is a Soy Sauce Free version of Chinese BBQ Pork!


1 or 2 Boneless Pork Tenderloin 2-3 lbs (Picture is only 1 tenderloin)

For Marinade:
1/4 cup Coconut Secret Coconut Aminos
2 T. honey
2 T. brown sugar
2 T. red wine vinegar
1 tsp. salt
1 tsp. five spice powder
red food coloring (optional) (No food coloring in the pictured version)

For the Sauce: Marinade plus 1/2 T. cornstarch
Sesame Seeds

Trim all fat from meat. Place tenderloin(s) in a gallon zippered bag. Combine remaining ingredients with a whisk until sugar is dissolved.  Pour over tenderloin(s) in the bag.  Seal out as much air as possible.  Place in the refrigerate overnight, turning occasionally.

To cook:  Heat oven to 350 degrees.  Reserving the marinade, place tenderloin(s) on a race in a baking pan.  Put in the oven and bake 45 min. or until internal temperature measures 165 degrees. Remove from oven, wrap in foil and let rest 10-15 min.

To make sauce:  Add cornstarch to a small saucepan.  Whisk in reserved marinade.  Bring to boil, reduce heat to low and simmer 1 min. more or until thickened.

Use an electric knife to thinly slice the tenderloin.  Serve with thickened sauce and sesame seeds.

Tuesday, November 19, 2013

Butternut Squash Saute

 This is how I used the remaining squash I had after I made SunButternut Quinoa Soup.
Serves 6-8

1 medium sized butternut squash, peeled*, seeded and cubed into bite sized pieces, about 4 cups cubed
1 T. olive oil
1 T. ground thyme
1 T. brown sugar
1/4 tsp. cinnamon

*Use a potato peeler and peel the squash like a potato!

Heat a large saute pan over medium heat.  Add olive oil, heat.  Add remaining ingredients.  Stir well.  Cover. Cook 2-3 min.  Open it and stir it.  Cover it again.  Repeat until squash is tender, about 12 to 15 min. depending on size of pieces.  Serve warm.  YUM!


Monday, November 11, 2013

SunButternut Quinoa Soup

I adapted this recipe from the Adam's Peanut Butter website!  Only I used Sunbutter instead.  I found it very good indeed!

Makes 6 (1 cup) servings

1 T. olive oil
1/2 c. chopped onion
2 cups, peeled, seeded, cubed to bite-size butternut squash
1 cup yellow corn
1/2 cup chopped red pepper
1/4 cup Sunbutter
1 cup water
1 tsp. cumin
1/2/ tsp. salt
28 oz. reduced sodium broth, chicken or vegetable
1/2 cup quinoa, rinsed well until water runs clear
2 tsp. finely minced cilantro
Cayenne pepper to taste, if desired (I didn't use this in mine, I don't like spicey)

Heat 4 qt. saucpan over medium heat.  Add oil.  Allow the oil to heat up, add onions.  Cook slowly until soft and yellow in color.  Stir in squash, corn and red pepper.  Cook 5 min.

Blend Sunbutter, water, cumin and salt in blender or food processor until combined.  Add to vegetables in saucepan.  Stir in broth and quinoa.  Bring to boil; reduce to simmer.  Cover and simmer 15 min. or until quinoa is tender.

Remove from heat.  Stir in cilantro; cover.  Allow soup to thicken 10 min.  Season to taste with cayenne pepper, if desired.

I typed this recipe into my Lose It! Kindle App to get the nutrition results:
per 1 cup serving:
206 calories
6.5 grams Protein
7.8 grams Fat
0 Cholesterol
using not low sodium chicken broth: 711.8 mg Sodium
28 g. Carbohydrates 

Sunday, October 27, 2013

Enchilada Casserole with Rice

A dairy free version of Enchiladas, serve shredded cheese and sour cream on the side if desired for those who choose to eat dairy.

3/4 to 1 lb ground beef or ground turkey
1/2 c. chopped onion, optional
1/2 c. chopped black olives, optional
1/2 to 1 c. refried beans, optional
10 oz. La Victoria Enchilada Sauce, 1/4 cup reserved for rice if desired
8-10 corn tortillas
Guacamole, optional

Heat oven to 400 degrees.
Brown ground meat and onions over med-hi heat in a skillet.  Stir in olives, refried beans and enchilada sauce, reserving 1/4 cup of the sauce for rice if desired.
Grease a small casserole dish, about the size of the tortillas.  Add just a thin layer of ground meat mixture to cover the bottom.  Place a corn tortilla on top of meat mixture.  Add another thin layer of meat, then another corn tortilla.  Repeat until casserole dish is full and all meat mixture is used up. Finish with a ground meat layer.  Carefully, so you don't wash away the top layer of ground beef, add 1/2 to 2/3 cup water over the top, more if you used 10 tortillas, less if you only used 8.
Bake 30 min.
Serve with rice, guacamole, shredded daiya cheese (contains yeast) or cheddar cheese(contains dairy), and sour cream (contains dairy).

To make Rice: Combine 1 cup rice with 1/4 cup enchilada sauce and 1 3/4 cups of water in a nonstick saucepan.  Bring the rice and liquids to a boil over high heat.  Cover.  Reduce heat to low.  Simmer, covered for 15 min.  When rice is done, there with be small holes throughout the rice.  Fluff it up with fork, serve with Enchilada casserole.

Saturday, October 19, 2013

Quinoa Chili

Made this up for a Relief Society activity and the ladies all loved it! Spiced nicely, but not hot spicey. Hannah liked it too.


(I doubled the recipe for the activity)

2 tsp. olive oil
1 med. onion, diced finely
3 cloves garlic, minced
2/3 cup quinoa, rinsed well until water runs clear and drained ( I used red quinoa)
2 large carrots, peeled and grated
2 cups tomato sauce
3 tsp. cumin
1 tsp. dried oregano
1/8 to 1/4 tsp. chili powder or cayenne (I use chili powder)
1/4 tsp cinnamon
1 cup water plus more (added as quinoa cooks for good consistency)
1 can bean (cannellini, red, pinto, or black) drained and rinsed well.  (I used pinto and black)

In a large saucepan, saute onion in olive oil until clear; add garlic.  Add quinoa, carrots, tomato sauce, spices and water.  Bring to simmer and cook 20 min. Add beans, cook 5 min. more.  Add water as needed.  It shouldn't be too thick, but also not runny like soup.

Saturday, August 24, 2013

Catalina Chicken- super easy!

Catalina Chicken

I apologize for the lack of photo.  This was an experiment for dinner tonight.  Didn't think to take a photo until the girls said they loved it!  I'll post a picture the next time I make it.

approx. 1/2 cup Low Fat Catalina dressing
5-6 bone in chicken thighs and legs, skinned

Make sure top rack in oven is in the middle of the oven. Preheat oven broiler 5 min.  Place chicken meaty side up on a broiler pan.  Broil chicken (I shut the oven door for this part) 10 min.  Turn chicken pieces over, broil another 10 min. (again I had the oven door shut).   Turn chicken again, this time, with a basting brush, brush chicken with Catalina dressing.  Return to oven, only this time, leave the door open.  Broil 4-5 min.  Watch it closely for burning.  Turn chicken, baste 2nd side with Catalina Dressing.  Broil 3-4 min. with the door open.  Again, watch closely for burning.  Lower chicken down a rack if burns too quickly.  Again turn so meaty side is up, give it a 2nd coat of Catalina dressing.  Broil 2-3 min.  Turn one last time and brush 2nd side with its 2nd coat.  Broil 2-3 min.  By this last turn, I moved the chicken down a rack as the dressing was getting dark rather quickly.  Then I turned the oven off but left the chicken in it about another 5 min. to be sure it was cooked thoroughly, but no longer burning.

What resulted was juicy perfectly cooked Catalina Chicken.  It was much like BBQ chicken but with a completely different flavor.   Yum!

Alternatively, you could use boneless chicken, broil just 5 min. each side before you add the Catalina dressing.

Sunday, June 30, 2013

Oatmeal Apple Cinnamon Muffins

"Their not good, THEIR YUMMM!" Hannah, age 12, Jun 30, 2013

Makes 12-14 muffins

1 medium apple, peeled, cored, shredded
Lemon juice
3/4 cup gluten free rolled oats, chopped smaller
1 1/3 cups gluten free flour or Rice Flour Mix
1/3 cup sugar
2 tsp. baking powder
1/4 tsp. salt
1 1/2 - 2 tsp cinnamon
2 T. warm water
1 1/2 tsp. Ener-G egg replacer
7 oz. rice milk
1/4 cup applesauce

Heat oven to 400 degrees.  Prepare the shredded apple, pack into a 1/2 cup measuring cup, dump into a cereal size bowl.  Sprinkled with lemon juice and stir.  Set aside.
Measure gluten free rolled oats onto a cutting board. Using a large knife, chop the oats through 3 or 4 times to make smaller "quick" oats. Put the "quick" oats into a large mixing bowl.  Add gluten free flour, sugar, baking powder, salt and cinnamon.
In a small bowl, combine warm water and egg replacer, wisk until egg replacer is dissolved and mixture is fluffy. Set aside.
Measure rice milk into a 2 cup measuring cup.  Add applesauce and the shredded apples.  Pour the apple rice milk into dry ingredients and stir a second until it begins to moistened. Add the fluffy egg replacer and continue mixing until completely moistened.  Spoon batter into lightly greased muffin tins or silicon muffin liners (do not use paper muffin liners) until 3/4 full.  Bake in a 400 degree oven about 23- 25 min.


Monday, June 10, 2013

Corn Flake Oven Fried Chicken

This is one of Hannah's favorite ways to eat bone-in chicken.  She cannot have Kentucky Fried or traditional fried.  Here is one easy way to make a gluten free crunchy "fried" chicken!  It is adapted from the Kellogg's Corn Flakes recipe called Double-Coated Chicken.  I've altered the amounts to coat 3 legs and 3 thighs.  Below you can find the quantities to coat 3 lbs of chicken pieces.

To feed our Family:
4 cups Kellogg's Corn Flakes cereal
1/4 cup olive or canola oil
1/2 cup rice milk
3/4 cup gluten-free flour
1/2 tsp. salt
1/4 tsp. pepper
1/4 tsp. garlic powder
1/2 tsp. paprika
1/4 tsp. onion powder
olive oil to drizzle
3 legs and 3 thighs, with or without skin (I usually do without).

Heat the oven to 400 degrees.  Prepare a large tray with racks to hold the chicken for cooking.  Measure the corn flakes into a large bowl.  Using your hands, grab handfuls of the cereal and and crush it between your fingers and palms until there are no more large flakes, but lots of little ones.  Set aside.
 Measure 1/4 cup oil into a medium to large plastic bag such as a ziploc or bread bag. (a sandwich bag is too small.  I use bread bags from the box, not the actual bread :)   Measure the rice milk into another bag, or small flat container large enough to fit the chicken pieces.  You may need more milk if you use a container.  Measure the gluten free flour into yet another bag or flat container.
Stir the seasonings into the flour mixture.
Line up your bags and containers in this order: oil, flour, milk, cornflakes.

Set prepared chicken next to the oil; and the tray with the rack next to the cornflakes on the other end.  Now, using one hand for wet and the other hand for dry, pick up one piece of chicken with your designated wet hand and place it in the bag of oil.  With your dry hand, closed it up a bit and shake gently to coat the chicken with oil.  With your wet hand, retrieve the chicken from the oil and place it in the flour.  With your dry hand, close up the bag and shake gently, or if using a container, scoop and pat the flour onto the chicken.  Still using your dry hand, remove the chicken from the flour and place it in the milk (keep your hand dry!).  Switch to your wet hand and quickly turn the chicken in the milk to coat.  Quickly remove the chicken with your wet hand before the milk completely washes off the flour.  The goal here is to just wet the flour.  Place the wet floured chicken in the corn flakes.  With your dry hand, scoop and pat the corn flakes onto the sticky wet chicken.  Again with with your dry hand, gently remove the corn flake covered chicken to the prepared rack, placing the piece so the majority of the meat is up and the bonier side is down.  Continue this sequence with remaining pieces of chicken until all chicken pieces are covered with corn flakes and resting on the rack.

Drizzle a bit of olive oil over each piece of chicken.  Place the tray of chicken in the preheated oven.

Bake for 45 min. at 400 degrees.  (The rack helps keep the bottom of each piece to not get too soggy).
Serve and enjoy!   We like to serve mashed potatoes with this chicken.

Amounts to cover 3 lbs of chicken pieces, skin or no skin:
7 cups Kellogg's Corn Flakes cereal
1/3 cup oil
1 cup rice milk
1 cup gluten free flour
1 tsp. salt
1/2 tsp. pepper
1/2 tsp. garlic powder
1 tsp. paprika
1/2 tsp. onion powder

Sunday, May 26, 2013

Double Chocolate Chip Cookies

"More Chocolate is always better."  Hannah Bray


Heat oven to 350 degrees.

The dry goods, wisk together in bowl, set aside:
1 1/2 tsp baking soda
1 tsp baking powder
1 tsp salt
2 tsp xanthan gum
1/3 cup cocoa

The egg replacer, wisk together in a small bowl and set aside:
5 T. water

The moist goods, cream together in a large bowl until creamy:
1 cup Spectrum Shortening or Earth Balance Soy Free Buttery Spread, or a combination of the two
3/4 cup brown sugar
3/4 cup white sugar
2 tsp. vanilla extract

The 2nd chocolate:
1 10 oz bag Enjoy Life Chocolate Chips ready to add last.

Slowly add the egg replacer mixture to the creamy sugary "butter" mixture.  Gradually add the dry goods.  Stir in chocolate chips.  Drop by tablespoonful onto ungreased baking sheets.  Bake for 12-15 min.
Do not overbake.  Less time, softer cookies; more time, crunchier cookies.

Makes about 5 dozen small cookies (as seen in the photo above) when I used a 1 tablespoon small scooper.

Monday, May 20, 2013

Tacos (Hannah Safe)

These are Tacos I have made from scratch before Hannah even came along.  They are Hannah safe and yummy!  Serve them up with corn tortillas, crunchy shells, or gluten free tortillas.

Filling:
1 lb. ground beef
1 tsp. instant minced onion
1/2 tsp salt
1/2 tsp chili powder
1/2 tsp corn starch
1/4 tsp crushed dried red pepper
1/4 tsp instant minced garlic
1/8 tsp oregano
1/4 tsp ground cumin
1/2 cup water

Toppings:
shredded lettuce
Daiya cheddar style shreds, optional
La Victoria Red Taco Sauce (Hannah likes Mild)
Guacamole, optional

crunchy taco shells, oil fried corn tortillas, or warmed gluten free tortillas (Hannah's favorite is crunch shells)

Brown the ground beef over medium-high heat in a skillet.  Strain off excess fat.  Add remaining filling ingredients; stir to combine.  Reduce heat to low and simmer 5 min. to thicken the sauce.

Fill shells or tortillas with taco filling, cheddar style shreds (optional), lettuce, and guacamole (optional).
Enjoy!   Serve with Spanish Rice.  (Sorry no picture of the completed Taco.  Hannah took it away and ate it faster than I could get out the camera to take the picture.  Maybe next time we make them I will get the picture. . .)

Easy Guacamole


This is by no means an authentic guacamole.  It's just my fast and easy version to serve with Tacos, Enchilada Bake, Taco Bake or just plain tortilla chips!

1 or more avocados, almost ripe or ripe
1 or more tablespoons La Victoria Salsa
1 or more long squeezes of the yellow lemon full of lemon juice in the fridge

Cut the avocado in half.  Twist it open into 2 halves.  Spoon out the half without the pit into a small bowl.  Remove the pit from the other half.  (I just use my thumb nail and fling it out.  The one time I tried to use a knife to "stab" it out, the knife when clear through and cut and my hand!)  Spoon this other half in the small bowl.  Using a fork, smash the avocado.  Add the salsa and lemon juice.  Stir it up and serve it up or cover tightly and store it in the fridge for up to 24 hours.  Any longer and it starts to look funny.  Mine does not last much longer than that anyhow.  Hannah LOVES this with tortilla chips

My trick to buying a good avocado:  I only buy bright green avocadoes.  The bright green one are still green (obviously) and hard.  They are not all bruised up.  I take them home and let them ripen on my counter for 1-4 days depending on their original greenness, when I want to use them and how ripe I want them to be when I use them.  They are ripe when they turn dark, almost purple and are somewhat soft to the touch.  I frequently use them in guacamole before they are completely ripe.

If you only want to use 1/2 an avocado, leave the pit in the un-used half, put in a plastic bag in the fridge for up to 24 hours. When you go to use it the next day, it won't be too very brown.  Remove the pit and use as you like.

Spanish Rice

I like to serve this rice whenever we eat a Mexican or Spanish themed dinner.  It's fast and easy and not too spicy if you use mild.  You can pump up the spice by choosing medium or hot salsa or enchilada sauce.

Makes 2 cups

1 T. olive or canola oil
1 cup long grain white rice
1/2 cup salsa or La Victoria Enchilada Sauce (contains soybean oil)
1/4 cup chopped onion if using Enchilada Sauce
2 cups water or chicken broth

Heat a non-stick 2 quart saucepan over med-high heat.  Add oil, allow to heat a moment.  Add rice and onion, if using; stirring occasionally to brown the rice.  Be careful not to burn the rice. Add the water and salsa or enchilada sauce.  Bring to a boil; reduce heat to low.  Cover and simmer about 18 min.  Rice is done when you see "holes" in the rice when you lift the lid. Fluff with a fork and serve.

(I'll get a picture the next time I make this!)

Biscuits and Gravy / Creamed Beef on Toast

This dinner serves as Hannah's equivalent for two of our families favorites; Creamed Beef on Toast and Biscuits and Gravy.  I use ground beef when we have Creamed Beef on Toast and ground sausage when we have Biscuits and Gravy.

When I make this for the whole family, I start with 1 to 1 1/2 lb. ground beef or sausage.  For Creamed Beef on Toast, I add 1/2 cup chopped onion to the ground beef.  I brown the meat over Med-High heat in a large skillet. To make enough gravy for Hannah for 3-4 biscuits or about 2 toasts, remove 1/4 cup of the browned meat to a separate saucepan.
Add to the browned meat in Hannah's saucepan:
1 T. potato starch
1/4 tsp salt
1/8 tsp pepper
1/4 cup beef broth
3/4 cup rice milk

Cook and stir until bubbly and thickened.
Serve over appropriate allergy free toast,  Biscuits or Bob's Red Mill Gluten Free Biscuit Mix prepared into biscuits.

To make more gravy- Alternatively:
1/4-1/2 lb ground meat (beef or sausage)
2 T. chopped onion
2 T. potato stach
1/2 tsp salt
1/4 tsp pepper
1/2 cup beef broth
1 1/2 cups rice milk
This makes more, approx. 2 1/2 cups of gravy to cover 8-10 biscuits.

Sunday, April 14, 2013

Snowballs

Snowballs

This is what Hannah calls this snack.  It is the adapted version of Chex branded Muddy Buddies.


8 cups Crispix or other corn/rice combination cereal
1/2 cup Sunbutter
1 tsp. vanilla
2 cups powdered sugar, divided into 1 cups
1 gal. zipper bag

Measure cereal into a large bowl.

In a 1 qt. microwave safe bowl, combine mega chunks, sunbutter, and earth balance "butter".  Microwave 30 seconds, stir, 30 seconds, stir, 30 seconds, stir.  Stir in vanilla.  Pour over cereal; stir to evenly coat.

Add 1 cup powdered sugar to zippered gallon bag.  Add 1/2 the chocolate covered cereal.  Seal the bag and shake up the cereal until well coated with powdered sugar.  Pour out onto a tray to set up.  Add another 1 cup powdered sugar to the zippered gallon bag and repeat the coating of the last 1/2 of the chocolate covered cereal.

This recipe filled 10 snack bags with snowballs.

Store the snowballs in airtight containers and in the fridge during warm weather.

Sunday, March 31, 2013

Chocolate Easter Bunny

This year in Honor of Easter and Hannah, for the first time, Hannah got a

CHOCOLATE EASTER BUNNY!


Why I did not think of this before, I have no idea.

Tools and Ingredients

A bunny chocolate mold, I used Wilton brand
Enjoy Life Mega Chunks

Use the amount of chocolate the mold calls for.  The mold I used for Hannah calls for 8 oz.  It made 3 bunnies and 3 baskets.  I melted 4 oz. of the chocolate in my microwave on a preset melt 4 oz. chocolate setting.  I removed the chocolate that did not even look melted.  With a rubber spatula, I stirred the chocolate and it melted perfectly!  I poured the melted chocolate into the mold and tapped gently to remove bubbles.  Refrigerate for 1 hour.  They popped right out!

I had a leftover decorated bag from other lollipop candy I had purchased.  I place 1 bunny and 1 basket into the bag, tied with a bow and VOILA!  a Chocolate Bunny to go in Hannah's Easter Basket!

Happy Easter Hannah!

Cinnamon Snack Cereal

Cinnamon Snack Mix

Ok, it can be a finger breakfast food too!

1/4 cup sugar
1 tsp. ground cinnamon
3 T. Earth Balance Soy Free Natural Buttery Spread

4 cups Corn or Rice or combo cereal such as Chex, or Crispix

Combine the sugar and cinnamon.  Set aside.
Melt Buttery Spread in a large microwaveable bowl for 40 seconds.  Swirl the bowl to help melt the remaining solid bits.  Stir in cereal.  Stir well to evenly coat cereal.  Microwave on high 1 min. Stir.  Microwave 1 more minute.  Sprinkle cinnamon and sugar evenly over cereal.  Mix well.  Microwave on High 1 minute.  Spread out to cool.  Store in an airtight container if you don't eat it all now.

Makes 4 cups.

Sunday, March 24, 2013

Updated Muffins and Rice Flour Mix

This morning I whipped up a new batch of Brown Rice Flour Mix to make Hannah some Chocolate Chip Muffins.  I realized I did not have Chocolate Chip Muffins on the Muffins, with Variations page.  I have added Chocolate Chip Muffins to the Muffins, with Variations page, with a photo.

I encounter a thick batter problem with this morning's batch of muffins.  Maybe it's because I used a fresh fluffy batch of Brown Rice Flour Mix?  Or maybe because I didn't use the spooning method, but the dipping method instead.  As a result, my muffin batter was too thick.  So I added an additional tablespoon or two of rice milk to thin it out a little.

This muffin batter is slightly thicker than a traditional muffin batter.  I used two spoons to spoon the batter into the muffin tins.

Also, the 10-12 muffin recipe makes 12 mini- muffins and about 5 regular muffins.  Cook the mini-muffins about 15-20 min.

I have made these changes on the Muffins, with Variations page.

I also added some notes about quantity and storage on the Rice Flour Mix page.

Sunday, March 17, 2013

Chicken Pot Pie

Chicken Pot Pie


Makes 1 regular pie, in either a pie pan or a 2 qt casserole dish

Prep time: approx. 2 hours

2 crust pie dough, chilled

2 boneless chicken breasts, diced and cooked or 1 cup diced cooked chicken
1/3 cup chopped onion
olive oil
12 oz mixed frozen vegi's such as peas, carrots, corn

1/3 cup potato flour
1 1/2 tsp. dried sage
1 1/2 tsp. salt
1/8 tsp. pepper

1 cup chicken broth
1/3 cup rice milk

Step 1.  2 hours prior to serving time, prepare the pie dough recipe. Divide it into two balls.  Place these in the refrigerator to chill for 1 hour.

Step 2.  While pie crust is chilling, dice the chicken breasts and the onion.   I like to use frozen chicken breasts that are still slightly frozen. The chicken is easy to slice into 1/4 in thin strips and then dice the strips.  Heat a deep saucepan over med-high heat.  Add a touch of olive oil. Wait a minute for oil to heat, then add chicken carefully, it may spatter a bit. Add chopped onion now too. Cook and stir chicken and onion about 3 min. to brown and cook through. (If you are using pre-cooked chicken, just brown the onion.)  Add the frozen vegetables.  Cook until frozen vegetables are heated.  Remove skillet from heat and set aside.

Step 3. Heat the oven to 450 degrees. Remove 1 ball of pie crust dough from refrigerator.  Allow to sit at room temperature for 10 min. to warm slightly.  Lay out one pie of wax paper large enough to cover your pie pan.  Place the pie crust dough ball on this piece of wax paper.  Lay out another piece of wax paper on top of the pie crust dough ball. Use a rolling pin to roll out the ball flat.  Roll it large enough fit your pie pan.  Remove the top sheet of wax paper.  Grease your pie pan.  Carefully flip your pie dough over into your greased pan, dough side down, wax paper side up.  Carefully peel away your wax paper and press and form the pie dough into the pan.  Trim the edges if any pie dough is hanging over the edges.  Poke the pie dough with a fork throughout the bottom of the pan.  Place the pie pan in the oven and bake the crust 10-12 min.  Remove the 2nd pie dough ball from the refrigerator to warm up.

Step 4.  Return the chicken/onion/vegi pan to medium heat.  Sprinkle the potato flour over the mixture.  Add sage, salt and pepper.  Stir this up a bit.  Then add chicken broth and rice milk.  Cook and stir over medium heat until thickened.  Once thickened, set aside.

Step 5.  When the bottom pie crust is done, remove from heat and set aside.  Reduce oven heat to 425 degrees.

Step 6.  Roll out the 2nd pie dough ball in the same manner as you rolled out the first, between 2 pieces of waxed paper.  Pour the chicken/vegi filling into the pre-baked pie crust in the pan.  Flip the 2nd pie crust onto the chicken pie with the dough side down, wax paper on top.  Carefully remove the waxed paper.  Trim any dough hanging over the edges.  Use a sharp knife to cut 3-4 steam holes in the top crust.

Step 7. Carefully place the pie in the oven.  Bake for 25 min. or until top crust is golden.  Remove pie from oven to a rack.  Allow to cool 15 min. prior to cutting and serving.

For individual pot pies, use individual pie pans.

Pie Crust from Scratch

Pie Crust

Makes 2 pie crusts

1/2 cup brown rice flour
1/2 cup white rice flour
1/2 cup tapioca starch
1 cup sweet sorghum flour
1 tsp. xanthan gum
1 tsp. salt
dash sugar (if using for a sweet filling, omit for savory fillings)
1 cup spectrum shortening
6-8 T. ice water

Combine the dry ingredients in a large mixing bowl.  Cut in shortening until crumbly using a pastry cutter or two knifes in a criss-cross fashion.  Add the ice water 1 T. add a time until it stirs into a ball. Turn out onto a lightly floured surface and knead a few times.  Divide the dough into 2 balls, wrap in parchment or wax paper, chill at least one hour or overnight.

Remove from refrigerator and allow to stand for 5 min. to warm slightly.  Roll each ball of dough between two sheets of parchment or wax paper.

Remove the top sheet of wax paper.  Gently flip and place uncovered side of dough onto the center of pie plate so the remaining wax paper is on top. Press the dough down to fit the form of the plate.  Carefully peel away the 2nd piece of wax paper.
 

Use a knife to cut around the outside edges of the pie plate to trip the excess dough.  Prebake or fill as desired.
Repeat the rolling processes for the 2nd ball of dough and use it for 2nd pie, or top crust on the first pie.
To prebake, prick with fork, bake for 10-12 min. at 450 degrees.
To make the fluted edges shown, I push down on the edge of the dough with my index and middle finger of my left hand, my fingers pointing into the middle of the pie, the fingers spread apart slightly.  I use the index finger of my right hand and place it between left fingers.  I pull the dough up and push inward gently with my right index finger while holding the edges under my left fingers down.  This makes one flute.  Reposition your fingers so your left index finger is where your left middle finger was and your middle finger is pressing on unformed dough.  Repeat the lift and push with your right index finger between your left index and middle finger.  This makes the next flute.  Continue in the manner around the edge of the whole pie.

Use a sharp knife to cut steam holes in the top crust, if desired.

Saturday, March 16, 2013

Chowder

Chowder

1 bowl of chowder for my girl!

1 c. rice milk
1 c. diced potatoes
1/4 tsp. dried minced garlic, or 1/2 tsp fresh minced garlic
1 T. dried onion, or 2 T fresh chopped onion
1 T. cornstarch or potato starch
1/2 tsp. salt
1/4 tsp pepper
1/4 c. corn, canned, fresh or frozen (thawed)

Combine rice milk, potatoes, garlic, and onion in a medium saucepan.  Boil down to about 1/2 c. remaining and it is slightly thickened and creamy.  In a small container with a lid, combine cornstarch and 1/2 cup of broth.  Cover with lid and shake until cornstarch is dissolved.  Stir cornstarch mixture into potato cream mixture.  Add salt, pepper and corn.  Cook and stir 1 min. more until creamy.  This might make 1 bowl with leftovers for 1 more, or maybe serves 2!

Serve with Garlic Toast Sticks.

Fruit Smoothie

Fruit Smoothie


It's winter/sprimg, so fruit it a bit scarce.  But with a bag of frozen mixed fruit, I can still make Hannah a nice fruit smoothie.  If you are new to smoothie's let me just say, add what you want and what you have!  There is not a set recipe.  Experiment!  This is fun in spring when the berries are in season and throughout the summer with all the colorful produce in season.  I personally like to add greens and vegi's to my smoothies. This morning Hannah would not have gone for it, so I left it out.

Today, this smoothie contained:

1/4 cup orange juice with calcium concentrate  (I use it to add the Vit.C and Calcium to Hannah's diet and tang to the smoothie)
1 ripe banana
1/2 a left over apple, cored, peel left on- it was reddish yellow apple, possibly Gala.
about 2 cups of mixed frozen fruit (pineapple, mango, peach, strawberries, red grapes)
1 medium carrot, snapped into about 5 pieces
Rice milk
water
some stevia

I use a  Blendtec Blender.  I added all the solids then filled the container with Rice milk to about the 3 cup line and water to the 4 cup line.  I usually add some ice, but I just realized I skipped the ice today.  I sprinkled in maybe a 1/4 tsp. stevia to keep it sweet.  I blended with the pre-set XL Smoothie setting on my Blendtec.  This made 3 large glasses of smoothie and served 3 of us.  Had Papa been home, it would have served 4 comfortably.

Bacon, Yum!

Easy Crispy Bacon (and a Clean Microwave)

This is how I make bacon.  Tools needed:

Bacon
a microwave, with a custom bacon setting
3 cheap thin truly paper- paper plates.  The kind you buy by the hundreds for super cheap that are usually best used for craft projects.
5 paper towels

The set up:


Fold 2 paper towel in 4th's lengthwise.  Place these across from each other at the edges of the turntable in the microwave.  Turn one paper plate upside down and place in center of the turntable.   Place 2 paper plates right side up on top of the upside down place.  Fold another paper towel in 1/2 on way, turn and fold in 1/2 the other way so you have a 4 ply square.  Place this in the center of the paper plates.  

Add Bacon:


Lay another paper towel, full size, over the paper plates.  Add 4-6 pieces of bacon; lay them out individually,  ends hanging over the long folded paper towels at the sides.  Cover the bacon with the last paper towel:

Cover the bacon completely; I folded it back so you could see the bacon between the paper towels.

Set the Microwave Custom Bacon setting following your microwave directions.
In this case of 4 pieces of bacon, approx. 3 min. later:
The bacon is crisp and the paper towels and plates have soaked up all the greasy fat drippings.  Carefully (it's HOT), removed the top paper towel and discard:

I'm not exaggerating when I say this bacon is shatter quality crisp.  Handle with care.  Squeeze too hard- it shatters.  Drop it- it shatters. Pull it too hard from the paper towel where it might be a bit stuck - it shatters.  
Carefully loosen the ends of the bacon; remove the bacon from the microwave and gently place on a plate.

Discard the greasy paper products.  Grab a clean, hot, wet dish rag and wipe the inside of grease steamed microwave clean in seconds.  Remove the turntable and quickly wash with a squirt of dish soap and hot water.  Return to your nicely cleaned microwave.

Devour the bacon.  Oops, I mean serve with Mom's Homemade Hashbrowns  crumble into bacon bits, or do what you will with this beautifully Easy Crispy Bacon!